Chile Chapters
How to Grow Hot Peppers Guide - Part 1/2 - What to Buy, Seeds, and Seedlings
Chile pepper plants are a tenacious bunch. They not only imbue the face-watering heat that we love, but are keen on devouring an abundance of the most direct sunlight. Their natural habitat is of course close to the equator. Since I am living in Florida, I thought that it was the perfect opportunity to try to grow some Habaneros, starting from seeds.
Depending on the variety, it will take about 60 to 90 days for the plants to start producing fruit. Even though chiles like hot temperatures, it is still possible to grow them in milder climates. For places with colder winters, it’s better to keep them in pots, indoors. They need warm air, and can’t deal with frost. You may also want to invest in a lamp and warming mat to get the seeds going.
Here are some basic tips for growing your peppers:
- Avoid over-watering as well as under-watering. The roots do not like to sit in water, and if you let it get too dry and douse it, then quality nutrients will run out.
- They prefer temperatures around 80 to 95 degrees
- Morning sun and direct sunlight is great for them
What You’ll Need
Seeds
You can pick up seeds for your chilli of choice at a local market, or from a reputable site online. Or find someone who already has some and ask for a few. I ordered mine from Tomato Growers Supply Company, since they were also based in Florida.
Small Plastic Cups
This is where your seeds will grow for a first few weeks. I like the technique of using two stacked short clear party cups.
Seed Starting Potting Mix
Any sort of seed starting mix will do. This soil is very loose, which helps the sprouting process. It’s also filled with lots of necessary nutrients.
Miracle Grow - Houseplant
This isn’t necessary, but worth picking up for a few bucks. A few drops of this stuff will help speed up the early stages of growth.
Watering Can
My only recommendation is to get a decent sized one, otherwise you might have to keep going back and forth to refill it.
A Few Weeks In: Clay Pots
Eventually your seedlings and their roots are going to outgrow the little plastic cups. After a few weeks I picked up some clay pots at Lowes. They are fairly cheap; only a dollar or two a piece. The store I was at had both brown and orange pots, allowing me to differentiate the orange habaneros and the black habaneros.
A few months in: Plastic Tubs (optional; or in your garden)
Since we were renting and did not have a garden set up, I bought large plastic containers (totes) from the hardware store. The roots will need to expand, and your plant can explode in size at this stage. Make sure these have drainage (I poked a bunch of holes in the bottom).
Planting Your Chile Pepper Seeds
First, make sure that you have a hole in the bottom of your plastic cup for drainage. I recommend using two short plastic cups stacked, with a small hole poked in the bottom of the inside cup. This allows watering from the bottom by pouring water in the interior cup. You could create the hole use a screwdriver, or with a knife tip (I twisted a knife tip through the inside, and then sliced/sawed off the protruding plastic flaps on the bottom). More info on this process in this video.
When should you start planting? Joe from PepperJoe.com makes this suggestion:
Start them indoors 6 to 10 weeks before the last expected frosts. Habaneros take longer to germinate than smaller pepper plants. It is ALWAYS better to be a little too late to start your seeds than too early. They will catch up in the Garden.
Fill your plastic cup about halfway with potting soil. Create a small hole in the dirt, about the length of a fingernail. Place the seed flat in the hole, and then loosely cover with soil. You may want to put two seeds in each one, just in case some don’t sprout.
Being in Florida, I kept mine outside near the edge of a patio awning, inside a planting tray. This gave it some natural indirect sunlight; direct noon-day sun would scorch and dry them up quick. You can also use a clear plastic container as a seed warming tray (like those under-the-bed storage containers), or a plastic cover/sarran wrap. Just make sure they are getting a good amount of sunlight, and the soil/air is warm enough. This could be indoors, in a well-lit windowsill. You may also want to invest in grow lamps and a warming mat, though I found that unnecessary.
You’ll want to water your soil about every other day. Do not let the soil get very dry to the touch, but do not leave the dirt drenched with free standing water. Unstack your two cups, and pour some water directly in the empty bottom cup, then place the cup with the soil and hole in the bottom on top, letting the water soak up from the bottom.
It will take 6 to 14 days for the seeds to germinate. Some may not sprout, which was the case with my first batch of seeds. Others may sprout early or late.
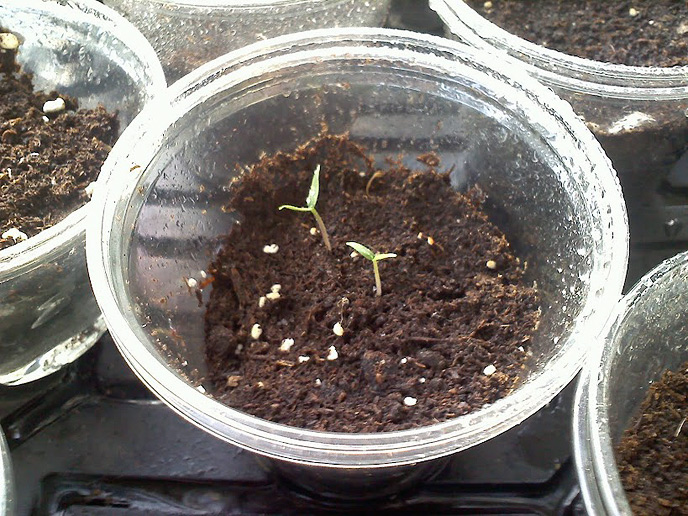
Seedlings

Grown naturally outside. Also pictured in the background, mango tree seeds growing in water.
The seedlings will start growing fast, and in ~2 weeks should be ready to be transplanted to larger clay pots. During this process of early growth, the plants are still weak, but they eventually get pretty tough and ready for as much sunlight as you can give them.
A note about Florida water; though our water here is notoriously chlorine-tasting (yuck!), the levels of chlorine should not pose a problem to the plants. My plants grew fine with Florida tap water. High levels of chlorine can lead to poisoning; the simplest solution I saw was to leave the water outside overnight, allowing the chlorine to dissipate.
Good luck! We’ll cover more about transplanting and pests in Part 2.
References:
- ratdavid9 Channel on YouTube: Growing Hot Peppers Series
- Pepper Joe: Growing Peppers from Seed
- About.com Gardening: Growing and Harvesting Hot Peppers [more on garden planting]
- The Hot Pepper Forum: Growing Hot Peppers